Introduction to Double Neck Guitars
A double neck guitar is a fascinating instrument that features two necks, allowing musicians to access distinct tunings or play different types of guitars without needing to switch instruments. This unique design can showcase various styles, most commonly combining a 6-string and a 12-string neck. The dual capabilities of a double neck guitar enable musicians to explore a wider range of sounds, making it an exciting choice for various music genres, including rock, jazz, and country.
One of the standout features of double neck guitars is their versatility. Musicians can seamlessly transition from strumming chords on the 6-string neck to creating rich, layered melodies on the 12-string. This combination offers both a unique aesthetic and functional advantage in performances. Renowned musicians, such as Jimmy Page of Led Zeppelin and Jeff Beck, have famously incorporated double neck guitars into their music, solidifying their place in rock history.
The appeal of DIY guitar kits has grown significantly among aspiring musicians and hobbyists. These kits provide an accessible avenue for beginners to acquire the skills needed to construct their own instruments while fostering a deeper understanding of guitar mechanics. Assembling a double neck guitar from a DIY kit offers the opportunity to learn about each component, such as pickups, bridges, and neck joins, enhancing one’s overall musicianship.
Additionally, building a guitar allows for customization, ensuring that the final product reflects the unique style and preferences of the player. With the growing availability of comprehensive tutorials and instructional resources online, engaging in guitar building has become an achievable project for countless music enthusiasts. The marriage of creativity, craftsmanship, and a passion for music makes constructing a double neck guitar an enriching experience for all who embark on this journey.
Overview of the DIY Electric Double Neck Guitar Kit
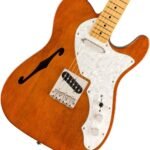
The DIY Electric Double Neck Guitar Kit represents an ideal starting point for beginner guitar enthusiasts seeking to create their own unique instrument. This kit provides an comprehensive platform to cultivate skills in woodworking and electronics, all while producing a striking visual and auditory output. The design is styled after the classic Telecaster, a model renowned for its crisp sound and versatility, which makes it a favored choice among many guitarists.
One of the key features of the DIY Electric Double Neck Guitar Kit is its right-handed design, facilitating ease of play for the majority of guitarists. The body is crafted from high-quality basswood, a material celebrated for its lightness and resonance. This choice of wood not only aids in reducing the overall weight of the guitar but also contributes to a vibrant tonal quality, enhancing the experience for both players and listeners alike.
In addition to the body, the neck of the guitar is made from hard maple, which is known for its strength and durability. This provides stability, ensuring that the instrument maintains its structural integrity over time. The smooth maple fingerboard further enhances playability, allowing for quick transitions and comfortable maneuverability across the frets. Furthermore, the inclusion of chrome hardware adds a contemporary touch while ensuring reliability in performance.
This DIY kit stands out for its beginner-friendly approach. By offering all necessary components and detailed instructions, it empowers individuals to build a professional-quality instrument without prior experience. As a result, it not only serves as an educational tool but also instills a sense of accomplishment in creating a customized electric double neck guitar uniquely suited to the player’s style and preference.
Tools and Materials Needed
Building your own electric double neck guitar can be a rewarding project, especially for beginners who have a passion for music and craftsmanship. To successfully assemble your electric guitar kit, having the right tools and materials is essential. This section outlines the necessary items you’ll need to get started.
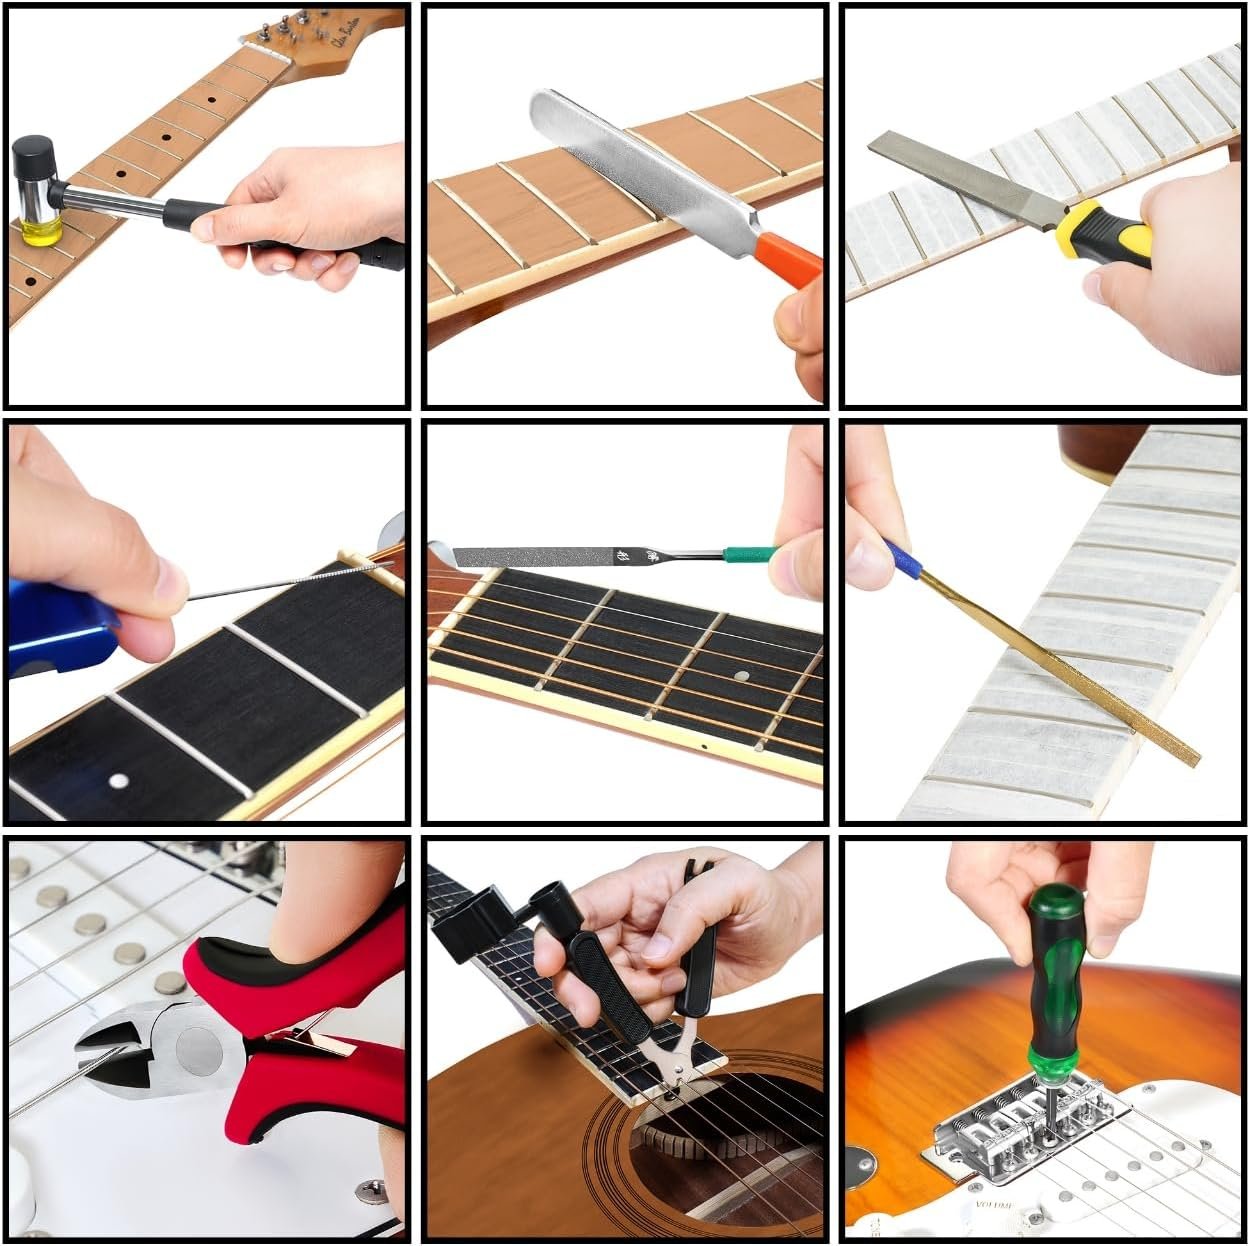
Firstly, basic hand tools are indispensable. A set of screwdrivers, including both flat-head and Phillips, will be required for various fastening needs. Additionally, a pair of pliers will aid in gripping and bending wires during the wiring phase. For cutting tasks, having a wire cutter and a utility knife is crucial for achieving clean cuts, whether it’s for strings or wire insulation.
Next, a soldering iron is one of the most vital tools in your toolkit. This will be used for connecting wires to pickups and other electronic components. Ensure you have solder as well, as it is required to create a secure connection. For safe work conditions, a soldering stand and a damp sponge can assist in keeping your workspace tidy.
Another important category of materials includes the guitar components themselves. A double neck guitar kit typically contains the body, necks, pickups, and hardware such as bridges and tuners. Additionally, you will need guitar strings specific to your desired gauge, a suitable output jack, and a selection of wires for connecting the electronic components.
Aside from these essentials, wood glue will be necessary for attaching certain parts of the neck and body together, ensuring your build is robust. Finally, don’t forget about tools for finishing touches such as sandpaper for smoothing surfaces and a suitable finish or lacquer to protect the wood. Having these tools and materials on hand will set you on the right path toward creating your custom instrument.
Step-by-Step Assembly Guide
Building your own electric double neck guitar is an exciting project that allows you to combine creativity with craftsmanship. This section will guide you through the crucial steps of assembling your double neck guitar kit, ensuring that you have a solid understanding of the process. Begin with preparing the body and neck of the guitar, as these are foundational components that affect the overall build.
Start by laying out all the parts and tools you will need. This includes the guitar body, necks, pickups, bridge, and other hardware components. Carefully read the instructions accompanying your kit for specific details regarding your model. It is essential to ensure that the body is free from dust and any surface imperfections that could affect the finish later.
Once you have prepared the body, move on to attaching the necks. Align the neck joints properly with the body, using clamps if necessary to secure them in place while you drill the holes for the screws. Pay special attention to the angle and alignment of the necks, as this will influence playability and sound.
The next step involves installing the pickups and wiring. Follow the schematic provided with your kit, carefully soldering connections between the pickups and the output jack. Good soldering is key to delivering a clean signal, so take your time with this step. Double-check your wiring to avoid any potential issues once the guitar is assembled.
After securing the electronics, install the bridge and tailpiece. This ensures that you have a solid anchor point for the strings, which is vital for tuning stability. Once the hardware is in place, you can add the strings, tuning them to your preferred pitch. Taking care to stretch the strings appropriately will help maintain the integrity of the guitar’s tuning as you continue to play.
As a final touch, consider applying a finish to the body for aesthetics and protection. Whether you choose lacquer, paint, or oil, this will enhance the visual appeal of your double neck guitar. Ensure it dries completely before playing. Following these steps will ensure that even a beginner can successfully assemble their electric double neck guitar with confidence and pride.
Finishing Touches: Painting and Finishing Techniques
The finishing touches on your electric double neck guitar are critical for both aesthetics and protection. Proper painting and finishing techniques can transform an ordinary instrument into a striking personal masterpiece. To begin, it’s essential to select high-quality primers and paints designed explicitly for wood. These products will ensure that the paint adheres well and provides a durable finish that can withstand regular use.
For beginners, a straightforward spray-paint job can be a gratifying starting point. However, meticulous preparation is crucial. Begin by sanding the surface of the guitar to create a smooth base and remove any existing residues or imperfections. After applying a primer, you can choose between an array of colors. Employ even coats while spraying to avoid drips and ensure a uniform look. Using a clear coat after the paint has dried is advisable to protect the finish and give it a glossy appearance.
For those who want to delve into advanced techniques, staining is an excellent option. Stains can enhance the natural wood grain, adding depth and character to your electric double neck guitar. Apply the stain with a brush or cloth, ensuring to wear gloves, as this will help you achieve a more controlled application. After the desired tone has developed, seal the stain with a clear lacquer to preserve its vibrancy.
Polishing is another technique to enhance the overall finish of your instrument. Utilizing specialized guitar polish or a simple microfiber cloth, buff the surface to achieve a bright sheen. This finishing technique not only amplifies the visual appeal but also prepares your guitar for the rigors of performance. Ultimately, personalizing your double neck guitar through these painting and finishing techniques allows you to create a unique instrument that reflects your style.
Tuning and Setup: Making Your Guitar Playable
Once you have assembled your electric double neck guitar, the next crucial step is to ensure it is properly tuned and set up for optimal playability. A well-tuned guitar not only enhances your performance but also brings out the best in your instrument’s sound. Begin the process by tuning the strings to standard pitch, which typically involves tuning the lower strings to E2 and the higher strings to E4 for the standard six-string neck. For a twelve-string neck, each paired string should be tuned to the same pitch, maintaining a rich harmonic texture.
After tuning, you should check the neck relief. Neck relief refers to the curvature of the neck, and it can greatly affect the action and playability of your instrument. To adjust this, press down on the first and last frets of the low-E string simultaneously and measure the gap at the 8th fret. A gap of 0.25 mm to 0.5 mm is ideal. If adjustments are necessary, you may need to adjust the truss rod located at the headstock in a clockwise direction to reduce relief or counterclockwise to increase it. Remember to make these adjustments gradually, allowing the neck time to settle.
Next, intonation must be assessed. Intonation determines whether the guitar is in tune along the entire fretboard. To check this, play the 12th fret harmonic and compare it to the fretted note at the same fret. If the fretted note is sharp, move the saddle back; if it’s flat, move the saddle forward. Finally, consider the action, which is the height of the strings above the fretboard. Lower action generally makes for easier playability, but too low can cause fret buzz. Adjust the saddle height accordingly to find a balance that works for your playing style.
By thoroughly addressing these aspects of tuning and setup, you ensure that your electric double neck guitar not only looks stunning but is also a joy to play, achieving the sound you desire.
Troubleshooting Common Issues
As you embark on the journey of building your own electric double neck guitar, encountering challenges is a natural part of the process. However, proactive troubleshooting can alleviate frustrations and enhance your experience. One common issue is the misalignment of necks. If you find that the necks are not perfectly parallel or aligned, it is essential to revisit your measurements. Ensure that all placements were marked accurately before securing the necks. Using a clamp to hold them in place while measuring can yield better results and prevent misalignment.
Another prevalent concern involves wiring problems, including issues with pickups and electronics. Ensure that the solder joints are clean and secure, as poor connections can lead to unwanted noise or complete failure of the electronics. It can be beneficial to familiarize yourself with a multimeter to test connections and identify any faulty areas. Additionally, if you experience hum or buzzing sounds, this may indicate grounding issues; recheck the grounding wires and connections throughout your guitar.
Moreover, inconsistent action or neck relief is a common problem that many builders face. If you find that the strings are too high or too low at certain frets, consider adjusting the truss rod. Small rotations to the truss rod can significantly impact the neck’s curvature. It is advisable to make incremental adjustments and allow the wood to settle before testing again. Furthermore, string gauge can also affect action—switching string sizes might necessitate adjustments in setup.
Lastly, the finish of your electric double neck guitar may encounter unevenness or blemishes. If this occurs, it may require sanding down the affected area and reapplying the finish. Patience is crucial in achieving a smooth and professional appearance. By remaining calm and methodical in troubleshooting these common issues, novice builders can cultivate both confidence and satisfaction in the assembly and setup of their instrument.
Benefits of Building Your Own Guitar
Creating a custom electric double neck guitar can yield numerous personal and musical benefits that enhance both the understanding of the instrument and the skills of the player. One of the primary advantages is the in-depth knowledge gained about the mechanics of the guitar itself. When individuals engage in the building process, they become intimately familiar with each component, including the body, neck, fretboard, pickups, and electronics. This comprehensive understanding allows for better maintenance and customization in the future, empowering the builder with the ability to troubleshoot and optimize their instrument for performance.
Moreover, building a guitar naturally challenges the individual to develop and refine their musical skills. Throughout the construction process, builders often experiment with various tones, woods, and pickup configurations. This experimentation can encourage a deeper exploration of musical styles and techniques, leading to a more versatile and creative approach to playing. As builders discover how different materials affect sound, they can pioneer their own unique sonic identity, adapting their style in the process.
Beyond technical skills and musical exploration, the act of building a guitar serves as an expressive outlet fostering personal creativity. The customization options are virtually limitless, allowing builders to infuse their personality into every aspect of their design—from aesthetics to playability. This creative endeavor can lead to a profound sense of accomplishment upon completion, instilling confidence and pride in the builder. Moreover, handling a custom-made instrument often enhances the emotional connection with music, as it embodies the time, effort, and passion invested in its creation. Thus, the journey of building an electric double neck guitar is as enriching as the final product itself.
Conclusion and Encouragement for Aspiring Guitar Builders
Embarking on the journey of building your own electric double neck guitar is an incredibly fulfilling experience, one that goes beyond the mere act of assembling wood and electronics. This DIY endeavor not only allows you to express your creativity but also provides a unique opportunity to learn about the intricate mechanics and artistry involved in guitar making. By following the steps laid out in this guide, you have taken the first steps toward creating a one-of-a-kind instrument tailored to your preferences.
Throughout your project, you may have encountered various challenges—from choosing the right materials to perfecting the wiring and setup. These obstacles are not merely setbacks but valuable learning opportunities that contribute to your overall skill as a builder. With patience and perseverance, each completed step will lead you closer to achieving a stunning double neck guitar that reflects your personal style and musical inclinations.
As you progress, remember that the journey of crafting an instrument can be just as rewarding as the final product. Embrace the learning curves and use them as fuel to enhance your skills. Each cut, each solder, and each adjustment offers a chance to grow—not just as a builder but as a musician as well. Once your electric double neck guitar is complete, you will undoubtedly take great pride in playing an instrument you designed and brought to life with your own hands.
So, gather your tools and materials, and take that leap into the world of guitar building! Whether you are an experienced craftsman or a complete novice, there are countless resources available to guide you along the way. The satisfaction that comes from playing a guitar that embodies your creativity and hard work is unmatched. Happy building!